
Hello Everyone 👋🏽, recently I distro-hopped to Debian Linux from Fedora Linux. And I thought I should write down all the steps that I did during this migration and installation of Debian to use it as my creative workstation. This can be of help for me in the future as a reference note and also for others. You can skip this introduction and jump right into the steps and get started.
Choice of Linux Distribution
A few years back I used Arch Linux and then I switched to Fedora. Arch was nice and it did not give me any trouble, but as I get old I am trying to save time here and there and spend it with my family and Arch requires some maintenance.
So I switched to Fedora and used it for roughly 2 years, but recently when a new change was made in Fedora, I was made aware by the community that I was unwise in my decision to choose it. I and probably other artists are not the target audience of Fedora, as it is a cutting/leading-edge distribution that may or may not be suited to be used as a production machine. Since Fedora’s mission includes “Features, First” it means that it tries to adopt new technology and pushes the Linux desktop ahead to shake out bugs before anyone else! In my opinion, it is a beta testing distribution not meant to be used in a production environment for people other than developers. People do use it as a production machine, it is a subjective thing, but whenever an event or change in Fedora happens by which your workflow is affected many will gladly point this thing to you, as it was very graciously pointed out to me by many in the community.
Testing and helping is all good only until the new tech is dead on arrival and breaks your workflow without offering any fallback which then leaves you no choice but to distro hop 😀. So from now on I will avoid suggesting Fedora to any of my artist friends. It is not meant for artists’ production machines. Today it is this change tomorrow it might be something else. I switched from Windows in 2014 to avoid forced updates and breakages, so Fedora is not so exciting choice for me.
So by taking the advice of the community, I am going to choose Debian. There is a chance that by the time the change happens in Fedora, in about 5-6 months if not all but some of the issues in Wayland might get resolved, but I do not want to leave it to chance and do the migration exercise on a day when I might be busy with work.
I hope Debian cares for the users and doesn’t pull the rug under my feet when the time comes. Yes, It has old versions of software for a desktop machine, but I think Flatpak and Appimages can help me stay up to date. Debian is also run by the community and has a longer release cycle so if a workflow-breaking change comes in the Linux world you at least get a chance to take a deep breath before drowning.
So let us hop to Debian now.
Choice of the desktop environment
I am using KDE plasma simply because I am very much accustomed to it. It has become a very core part of my Linux experience. I have tried other desktop environments but KDE Plasma won in the end. It does many small quality-of-life things out of the box that many do not. For example providing thumbnailing support for Krita, Blender, GIMP, and Photoshop files. Providing extensive tablet configuration, being friendly toward point-and-click user interface, people think being keyboard friendly is a good thing but when you use a graphic tablet for the majority of your work you do not have both hands on your keyboard and excessive mouse movement becomes tiresome. And more importantly, having an awesome community.
Step 1 – Back up the existing installation
The most important step is to back up existing files and folders. I copy my entire home folder with rsync to an external hard disk. I also do regular daily backups in a separate internal hard disk and one more in a different machine at a different location. So I have three copies of the data. You can call me paranoid, but once you lose your data it won’t come back. So better to take precautions beforehand than get burned later. There is an excellent stack exchange answer about using rsync to back up your home directory with exclusions here you can use it, or you can manually copy the files and folders too.
Step 2 – Get the installation media
We need to download the Debian iso. You can download the KDE live session iso from this page, and search for the “Live KDE” link. You can flash this live iso on a thumb drive and test it before installing. I want a minimal install so I am going to use the default net install iso. You can download it from the homepage.
Once you download the iso prepare a suitable USB thumb drive that has enough space to accommodate the iso. I am using the command line to prepare the USB installation media mentioned in the user manual. You can use utilities like etcher.
# cp debian.iso /dev/sdX
# sync
I make sure to check the disk I am copying to since this command will destroy any data on the disk. So double-check the /dev/sdX part with the lsblk command.
Step 3 – Installation
Debian installation is fairly straightforward, if you are okay with the defaults you can refer to the official manual. In my case, I wanted a different setup. I need btrfs for snapshots and backups. I take hourly snapshots of my home folder and keep daily incremental backups. This has helped me in the past when I had deleted some files by mistake or wanted a version of my work from 1 hour before. I would advise you to use the default filesystem that is ext4 if you are not okay with btrfs but it has its advantages.

Choosing the Btrfs filesystem makes this installation a bit technical so I will refer you to the video that I mostly followed in addition to the steps and changes that I did. The video is from Drew Griffin and you can follow through the tutorial here on YouTube.
The installation process involved manual steps of creating desired sub-volumes in Btrfs using the TTY screen other than that it is fairly straightforward. Drew selects a non graphical expert install where as I select a graphical expert install. Both are the same except non graphical installation shows you a terminal UI whereas as graphical one shows you a point-and-click UI with the same options.


Btrfs filesystem
After following through the usual steps, like setting up a hostname, username password, locale, etc the installer will ask to detect disks and then partition them. I followed Drew in this step and created a GPT partition table and a 512 MB EFi system partition and a BTRFS file system for the rest of the disk. Similar to Drew I am using Zram for swap. I switched to TTY by using CTRL + Alt + F2 and then unmounted the disks and remounted them again in /mnt just like Drew. This brought back memories from my Arch Linux setup.
And then here is where I did something different than what Drew does, I made two sub-volumes named “root” and “home” while drew uses @ and @home there is no need to put the @ symbol. I made an additional folder beside the sub-volumes to store the snapshots. I am going to use btrbk and it expects this setup.

File system flags and Compression
Drew also puts many mount options, modern Linux kernel and BTRFS options have evolved and we do not need to specify so many mount flags. The mount flags that I used are :
defaults,subvol=root,compress=zstd:1I am using zstd compression on my volumes and specifying which sub-volume to mount. Now I continued the same steps as in Drew’s tutorial. While switching back to the installed since we are using a graphical installer, we need to press CTRL+ALT+F5. Now follow along with the tutorial as it is.
No Root login password

I have not enabled root login and that enables sudo access to my user. It is safer this way if you need to access root as a user account you can choose to allow login as root when the installer asks about it. I have also enabled non-free firmware as some of the wifi chips would need it to run.
Desktop Environment and installing applications
When it asks you which Desktop you need you can install the KDE plasma or any other environment you need. I chose not to install anything and install it manually since I can choose to install only minimal things. If you did the same you should boot to a tty login screen from here you can install the required packages
~ $)sudo apt install kde-plasma-desktop kmail okular neovim gwenview kde-spectacle dolphin-nextcloud btrbk flatpak borgbackup nextcloud-desktop gnupg2 libnotify-bin python3-pyudev quassel-client ark ruby rar unrar-free zsh filelight micro speedcrunch btrfsmaintenance freefilesync syncthing samba kdenetwork-filesharingI have included packages that I need and I might have missed some packages here, but you get the idea. The kde-plasma-desktop package will give you a minimal KDE plasma desktop environment. You can install other things as you go. I also added the flatpak repo as per the official Flathub guide.
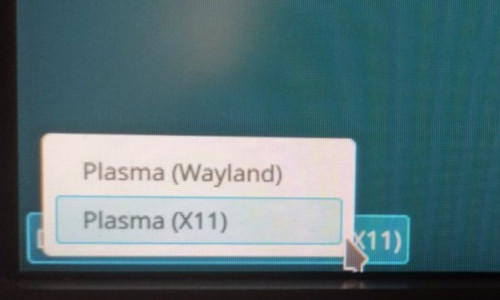
Wayland or X11
After this, I rebooted and login to the plasma desktop for further configuration. Debian provides both Wayland and X11 login sessions. Currently, I use X11 for my work since there is no proper Colour management support (it is a work in progress and it will take some time for the Wayland ecosystem to reach parity with what we have now on X11), the graphic tablet configuration is currently lacking a few things under Wayland and there is no command line alternative like in X11. The applications that I depend upon also do not support Wayland natively yet and run via Xwayland which can lead to issues and glitches. This will surely improve in the future and the developers are working hard on implementing the missing components. Fortunately, Debian provides a way to fall back to X11, unlike Fedora which will drop X11 packages for KDE spin from the 40th release.
Step 4 – Restoring from Backup
Since I have Btrfs snapshots in one of my internal drives and I had also rsynced a copy of the home folder in it restoring is as easy as copy-pasting files. I copy my work folders back and copy some settings of applications too. The settings are stored in ~/.config folders. I also copy various scripts that I have in ~/.local/bin
Generally, I clean up my home folder when I migrate to a new OS like this. It is a good time to clean and delete unnecessary download files as well as configuration files of unused applications.
So I would advise you to copy back all your data in this step.
Step 5 – Getting Software for Our Creative Suite
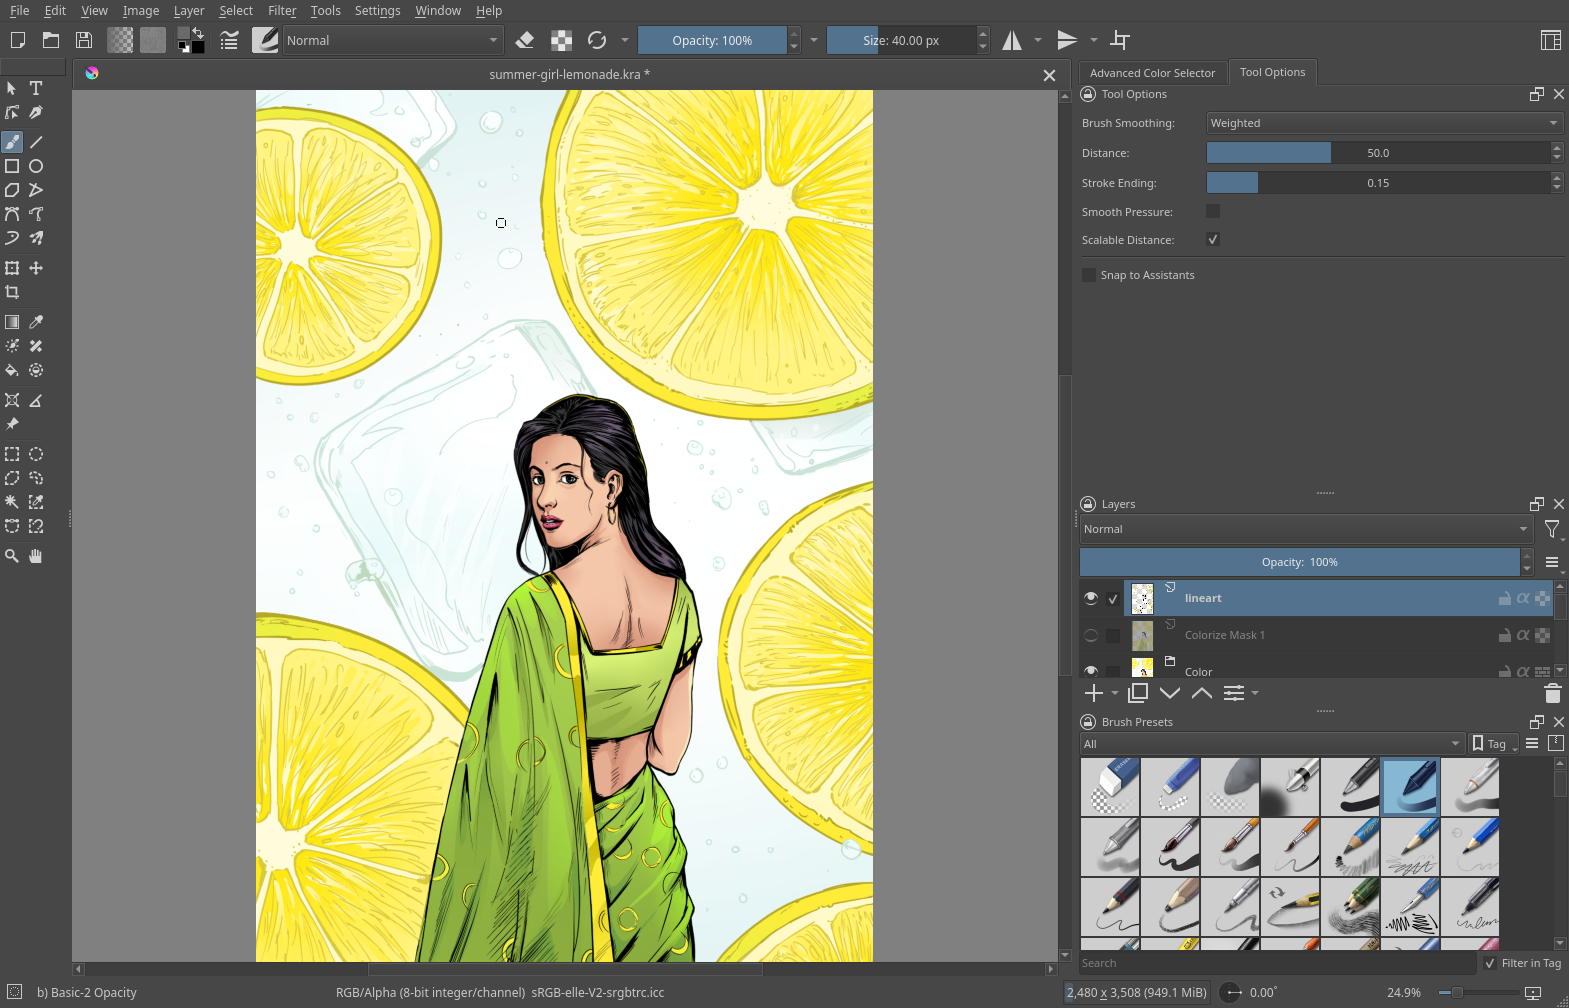
Krita – Digital painting
First and foremost let us download Krita from the official website. I am not using Krita from the repository because it is a bit behind in the Debian Bookworm repository and Krita adds in patches to make it more stable which are not yet upstream. I use both nightly and stable builds of Krita. So Appimage along with automatic Appimage updating script works nicely. You can set it up by following my earlier article.
Inkscape – Vector illustration and designs
I use Inkscape from the Flathub repository and also an older version Appimage from the Inkscape website (I will tell you why in a moment). Once you have added the Flathub repository as mentioned above you can install it from the Discover software centre. You can choose the source as a flathub repository.
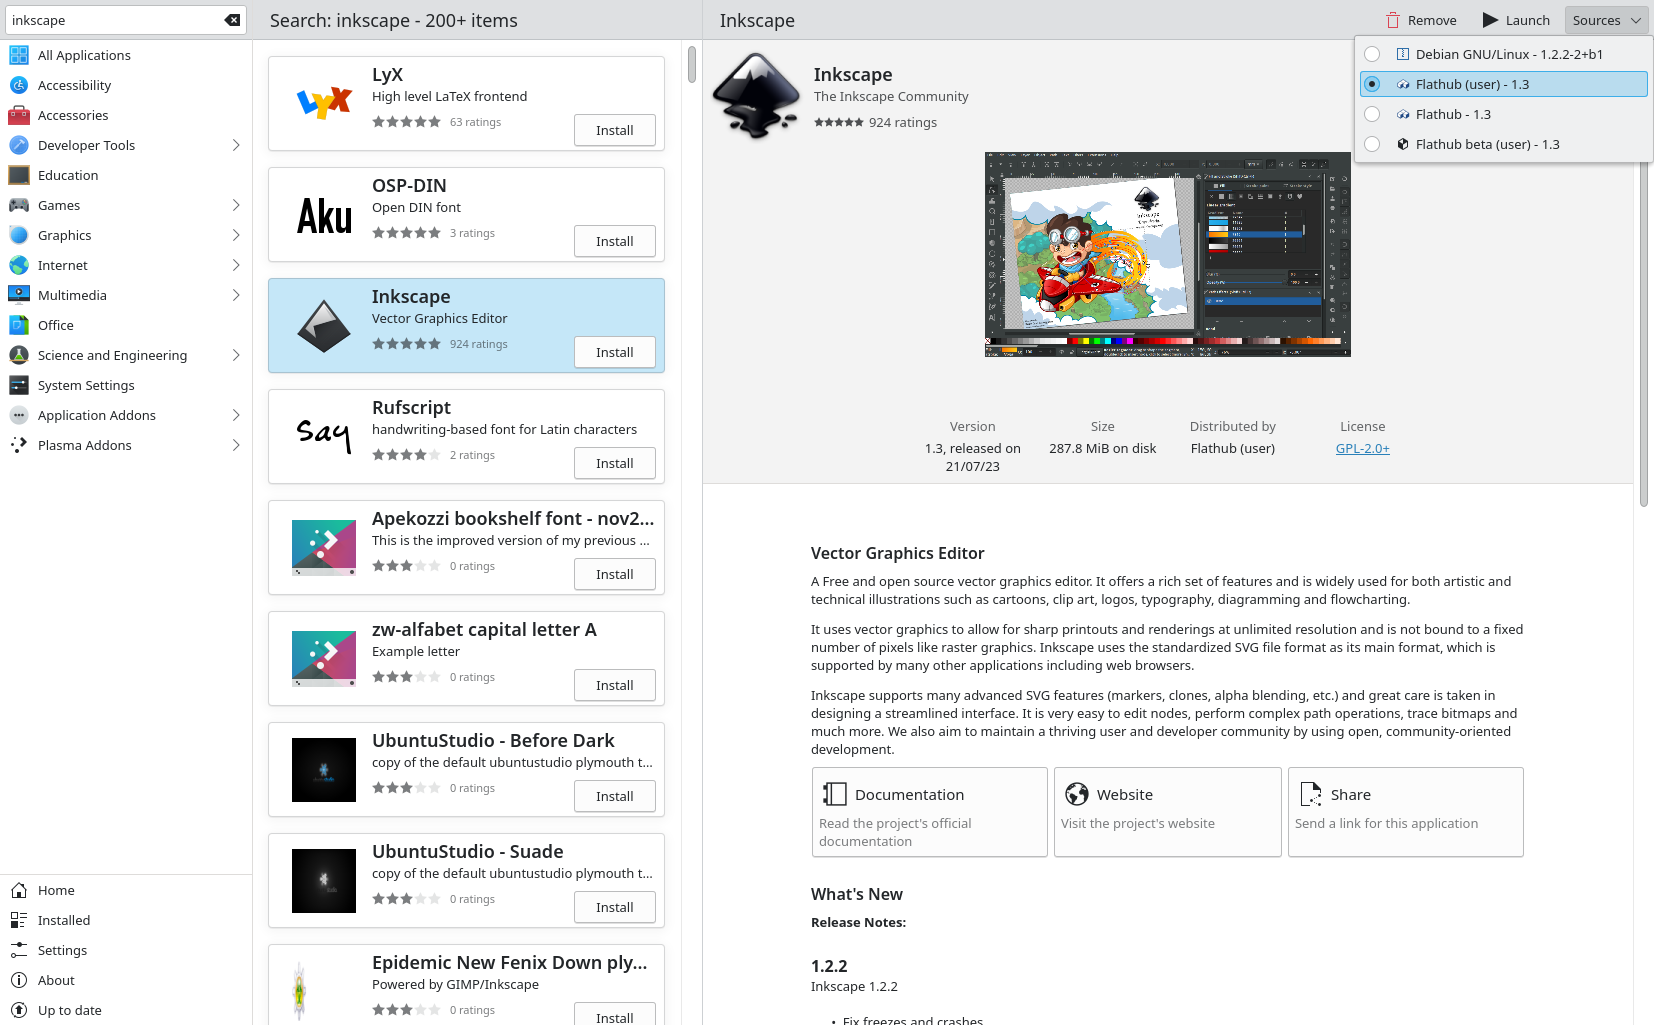
The latest version of Inkscape behaves differently when importing PDF documents. My clients often give me Adobe Illustrator files saved as pdf. And in 1.3 importing pdf sometimes randomly messes up gradients and blending modes. I am planning to investigate this further and report a bug. So I will keep a copy of the older version to import PDF.
Blender – 3D modelling
Blender developers provide stand-alone tar files that can be extracted on a folder run like a portable application. I can have the flexibility to update when I want and also go back to any version this way.

Other Software
In addition to these three, I also use the following
- GNU Image Manipulation Program – Photo retouching and editing. I installed the beta and stable versions from the Flathub repository.
- Kdenlive – Video editing – I downloaded the latest Appimage from the website
- Audacity – Sound Recording and editing – Appimage from the website
- Scribus – Desktop publishing software – I download the latest Appimage from the website.
- OBS studio – Desktop video recording and live streaming – I install this from the Flathub repository.
- Imagemagick – Batch operations on images and .KRA files – I installed it from Debian repository
- Nextcloud Desktop – Uploading and sharing files with the client – I install this from Debian repository
Step 6 – Setting up the graphic tablet
After installing all the essential software I went ahead and configured my graphic tablet. Most of the tablet on Linux is plug and play but sometimes there are exceptions. For example, if your monitor is of a different aspect ratio than your tablet you need to map an area on the tablet to the aspect ratio of the monitor. Sometimes there will be no support for the model of your tablet or you may need to install drivers etc.
KDE under X11 provides a very extensive way to configure your tablet. it gives you a way to create multiple profiles that can be used for different scenarios and programs. For example, you can have a profile for inking work or a profile dedicated to a particular application.
It also gives you a way to edit the pressure curve which might come in handy if you are a person who draws with light touch or with heavy touch. If this configuration page is not showing up since you installed a minimal version of the plasma desktop like I did, you can install the required configuration package with the command below
sudo apt install kde-config-tablet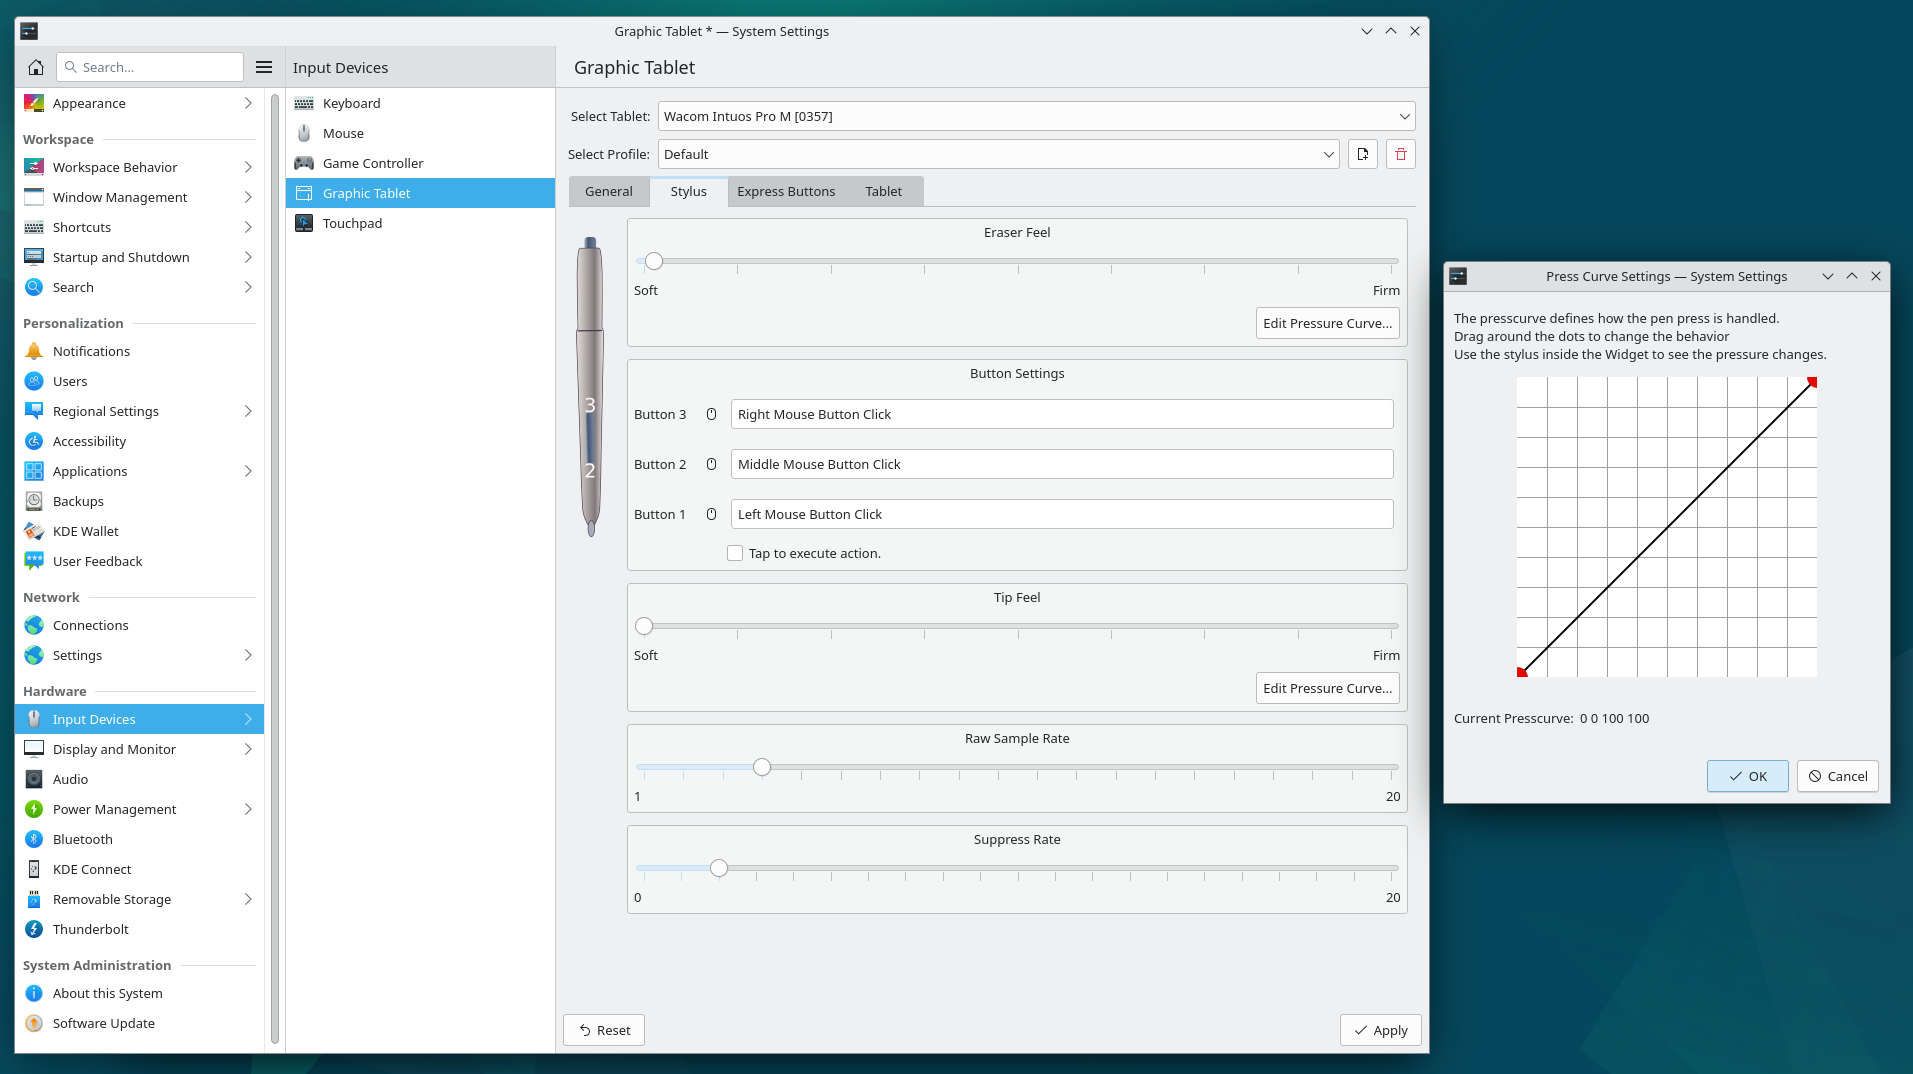
If you are having issue with this configuration page you can use the command line utilities that are provided under X11 tablet drivers. It is called xsetwacom. You can read it here in my article which covers the setup -> Huion H610X Graphic Tablet – review and setup on Linux.
I kept the Raw Sample Rate to 1 and the Suppress Rate to 0, you can go with the defaults which is 4 and 2. Basically it doesn’t drop data coming from the tablet to smooth things out.
I use python script instead of a bash script made to autorun when the Desktop Environment starts. The python script monitors the device and does the configuration through xsetwacom each time the device is plugged in.
Step 7 – Colour calibration and profiling
We do our colour calibration using Argyll cms and we have a nice GUI for it called Displaycal. So first we need to install it from the Debian Repository.
sudo apt install displaycal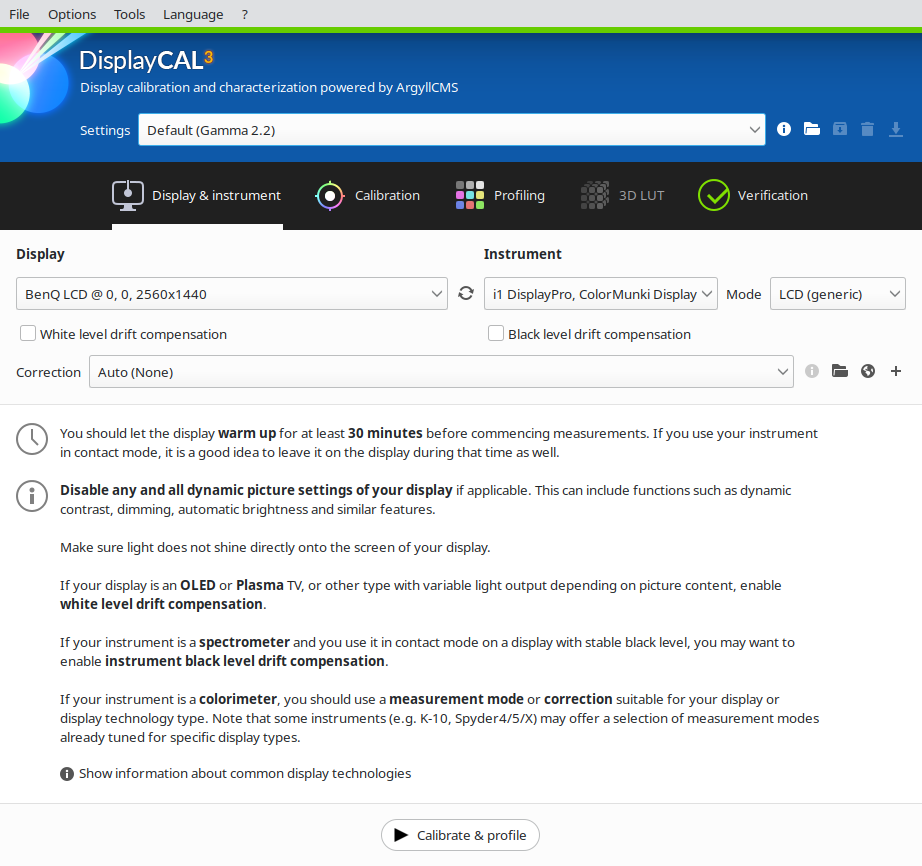
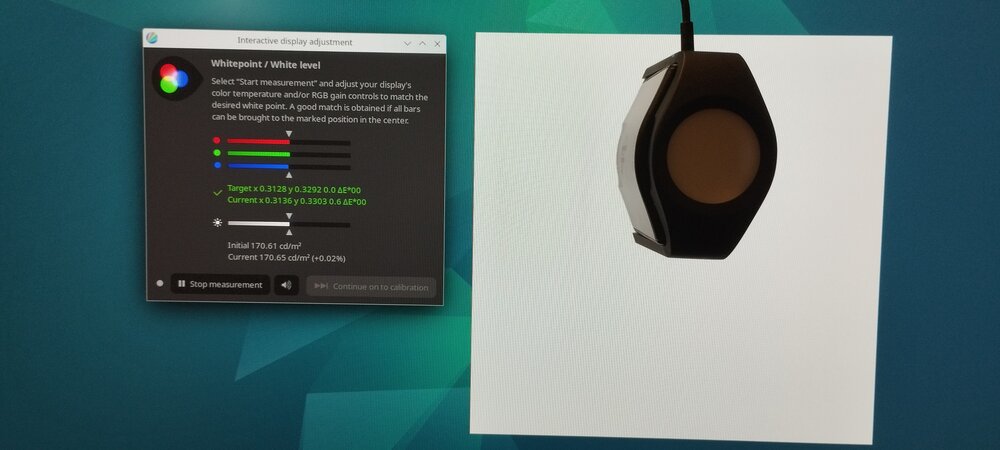
I kept the brightness around 160 to 170 cd/m2 and set the white point colour temperature to 6500K, Gamma is set to 2.2. Some people keep high brightness, but it becomes too bright if you have a dark room so I would suggest keeping it in the range of 120-180, this also keeps the whites on your screen roughly close to the white of paper sheet.
I have two monitors one had 99% Adobe RGB coverage and other has 99% sRGB I run this calibration and profiling exercise on both. Having Adobe RGB coverage helps to get good CMYK support as sRGB loses some of the greens.
If you do not want to install Displaycal you can do the calibration by using Argyll cms command line utility. You can read about how to do that in this article by my friend Timothée Giet here. Timothée thought me how to calibrate my display on linux in one of the Krita sprints.
There is a colord package for plasma desktop which helps us to assign colour profiles for devices. You can install it from the Debian repository
sudo apt install colord-kdeAfter this, in the systemsettings you should see colour corrections entry under hardware section. If Displaycal has not already loaded the profile for you, you can choose the profile here for your monitors.
Step 8 – Other tweaks and software
Btrfs tools for maintenance
After installation we can configure some of the btrfs maintenance tools. I enable fstrim systemd timer which will periodically run trim to discard unused block on the ssd. I think this is not needed anymore starting from 6.2 kernel but Bookworm has 6.1 so I enable this for now.
sudo systemctl enable --now fstrim.timerI had installed btrfsmaintenance package earlier, this package provides some of the btrfs utilities like balance and scrub. Scrub is useful to detect errors in the files and it is really helpful when you have something like RAID it repairs the file if a copy is available. I use only single disk but it is helpful to detect errors. You have to edit the configuration file /etc/defaults/btrfsmaintenance with nano or micro editor and fill in the relevant information like mount point, frequency to run balance and scrub etc. And then you can enable the timers for respective utility.
sudo systemctl enable btrfsmaintenance-refresh.path #watches the config files and reloads the timers
sudo systemctl enable btrfs-balance.timer
sudo systemctl enable btrfs-scrub.timer
Firewall
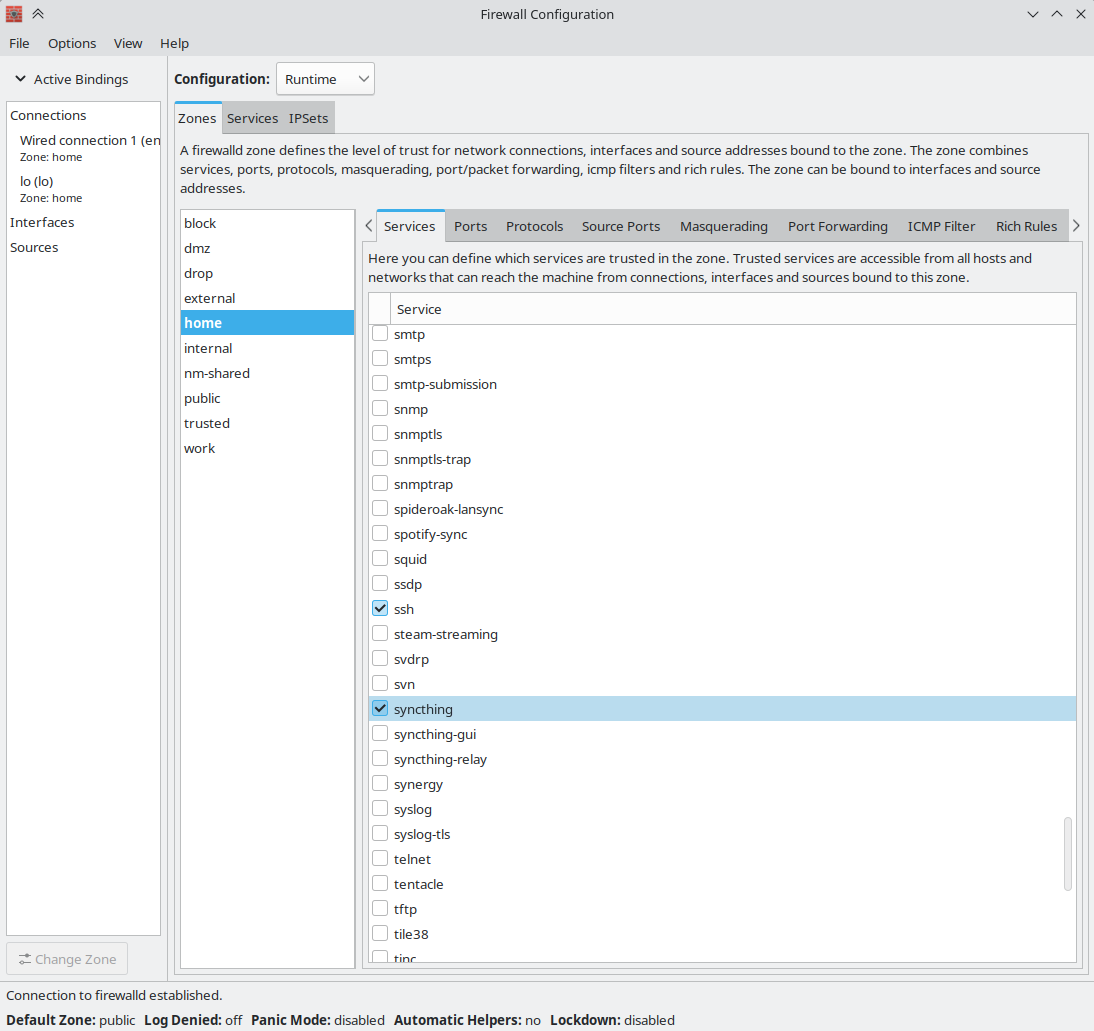
We need firewall setup to protect our machine. My home router has a good firewall but I still install firewall application on my work machine for additional safety. I install firewalld and its GUI for configuration.
sudo apt install firewalld plasma-firewall firewall-configThen you may need to configure and allow services according to your needs in the firewall configuration application. I allowed syncthing samba and kdeconnect. I also switched my zone to home from public since this is not a public place.
Printer
Now I have finished setting up the most important things required so I will set up my printer and scanner. I have a printer from Brother that comes with drivers for Linux, so I follow the installation procedure given with it. I will probably switch to a different model from Brother or HP which is plug and play.
Scanner
I use the Canoscan Lide 400 scanner which works well on Linux. I just installed and used Skanlite from KDE, it works well and does the job beautifully. It also gets all the required drivers and other data so there is no need to install anything else.
Dolphin file manager
I also enable file thumbnail previews for the file format of Krita PSD and Blender along with others in Dolphin file manager. I must say Dolphin is an excellent file manager, it is involved in my daily work. I also have a custom right click service menu in Dolphin to initiate a new project where it automatically creates the relevant folder required for the project.
I have already installed Dolphin Nextcloud plugin so when I set up my cloud it will show emblems denoting sync status over the files and folders.
Backups
I set up btrbk for hourly snapshots and dedicated one of my internal hard disks for storing btrfs backups via Btrfs send. All this is handled by btrbk. I will write a separate blog post for this. I also use freefilesync, an application that helps me to sync my work folder to an external hard disk every week. I also have syncthing which syncs some of the files and folders between my laptop and two work computers. With this, I have multiple backups.
Additional Software list
- Strawberry – Music player – installed from Flathub
- ffmpeg – Installed from repository – used for command line video and media processing
- jpegoptim – command line utility to compress and process jpg files
- oxipng – command line utility to compress png installed as instructed in its github page through cargo
- zsh – alternative shell , once installed you can change the shell according to this arch wiki.
- git – version control system
- samba for sharing folders on network
- Quassel client – IRC chat – I self host Quassel server and this is the client for that
- Gajim – XMPP chat application for chat with friends and family – installed through Flathub
Conclusion
It has been approximately one month since I switched to Debian and it has been really good. The update frequency is low and the system is stable. I like the calm and quiet feel to it, perhaps this migration should have happened years ago. The stability of Debian combined with Flathub and Appimage has given a good a reliable production system to me.
I also have more time to concentrate on my work rather than all the drama and chaos of updates and changes. I am sure by the time the next release for Debian happens everything will be settled down and there will be few things to worry about. I will report bugs for Wayland implementation and try to make the developers aware (if they are not already) about the lacking things in Wayland and hopefully we can get the issues resolved. Meanwhile the applications I use too hopefully will get native Wayland support.
Hope this article is useful to you, if you have any questions please ask in the comments. Thanks to Drew for making the YouTube tutorial for btrfs installation.
Additional Resources and Links
- It would be best if you subscribe to Debian Announce mailing list here. This was you will know if there is any release or general issue with upgrade etc. There is also micronews.debian.org for rss feed of the news
- There are debian user mailing list as well but those have high traffic and your email folder may get lots of mail so I suggest checking the archives from time to time.
- Also go through the Debian Bug Reporting system once. Debian has its own command line bug reporting program which is very helpful but I would suggest you read the main webpage first – https://www.debian.org/Bugs/Reporting
5 Comments
Debian has a Multimedia repository which can be added to Discover and Synaptic (Google for instructions on how to add it). Most of the titles you mention are here and up to date. Debian will keep these updated if installed from Discover/Synaptic.
Thanks for this information I will check this repository. Is this something like backports?
A really interesting blog.
I’ve been using Kubuntu for a few years for a photo editing / audio editing / 3D Design / 3D printing workstation. Recently I thought I was being “clever” by doing a clean install of Kubuntu 24.04 over 23.10 (which was working quite smoothly, although was facing soon facing End of Life).
At first I thought to myself “Oh, look, a nice install of Kubuntu 24.04, with nice shiny new software”.
Until I started opening some appimages to get some work done.
And they failed to launch due to missing older versions of libraries which came with Kubuntu 24.04! For example the Orca Slicer V2.0.0 (which is the latest stable version) looks for libwebkit2gtk-4.0, which is not installable in 24.04, which instead ships with libwebkit2gtk 4.1.0. While appimages are meant to be self contained, it seems some still look for external libraries.
How soon will it be before the appimages I use update to recent builds for the latest releases of Ubuntu? I’m not sure!
I can’t deal with the stress of running a rolling release distro, so I suspect I’ll be switching to a Debian based KDE distro (Possibly MX Linux KDE version), and just get on with my work rather than worry about big 6 monthly updates breaking my workflow!
Yes, The new and shiny is really great until it breaks. We just have to be patient and wait for things to stabilize and I think Debian fits in this scenario perfectly
Hi! I use Btrfs for all systems that I install. On Fedora (Anaconda installer) most of that can be done entirely by the installer, but on Arch Linux and Debian that step is just manual, fstab. Or actually I believe that the new Calamares installer on the Debian Live ISO can also do it, but I didn’t really try that installer for Debian yet, as the old Expert install still has more options.
Good to note by the way is that `noatime` is adviced as mount option for Btrfs, to drastically improve performance. Not `relatime` either. This prevents metadata copying, which has disadvantages.
And I also use `autodefrag`, because it only runs when you actually write to files (when you are already breaking reflinks), and I have good experience with it, but opinions by people still vary about it.
compress=zstd:1 like Fedora does it, although on slower drives I use level zstd:3, which is the Zstd default. But with the lowest compression you are sure that even the fastest NVMe SSDs don’t slow down.
I also use the @ naming convention, because they say that’s also what the Timeshift needs and it has kind of become a standard, and I like it.
I do not actually use a snapshot application though, I have just written my own scripts to manage my snapshots, and even to export and backup those with btrfs send, so that my installations have infinite lives :P. Great for Arch, which I have put tons of configuration and customization into, and where things can sometimes go wrong.
By the way, Btrfs is still not recommended for locations where you want store large VM images and things like that. Store those on another file system.
Because storing those is too sensitive for fragmentation and can eventually result in quite serious issues.
Fragmentation sensitivity is a limitation of COW. And therefore also applies to ZFS, which is at least as amazing by the way (especially for data storage pools it’s the best file system that exists, there is nothing more robust).
For VM images I just use Ext4 and NTFS.