Gone are the days when you had to manually arrange the edges of a texture or pattern. No more copy-pasting, aligning, and offsetting the tiles. There is an easy and user-friendly mode in Krita that makes the tedious task of creating a seamless texture or pattern a piece of cake.
Game developers and textile artists will find this feature immensely helpful and time-saving. I was blown away by this feature when I first tried Krita. It has existed in Krita for ages and only recently did Photoshop get an inferior version of this feature.
I am assuming you have already downloaded and installed Krita from the official website. So without further ado let us see how it is done.
Step 1 - Create a Document
We will create a new document in Krita. Most seamless patterns are squares but in Krita, you can create rectangular tile too. Open Krita and you will be greeted by a welcome screen. Click on the New File link in the Start section. Or you can also press the shortcut CTRL + N . A new file dialog will open.
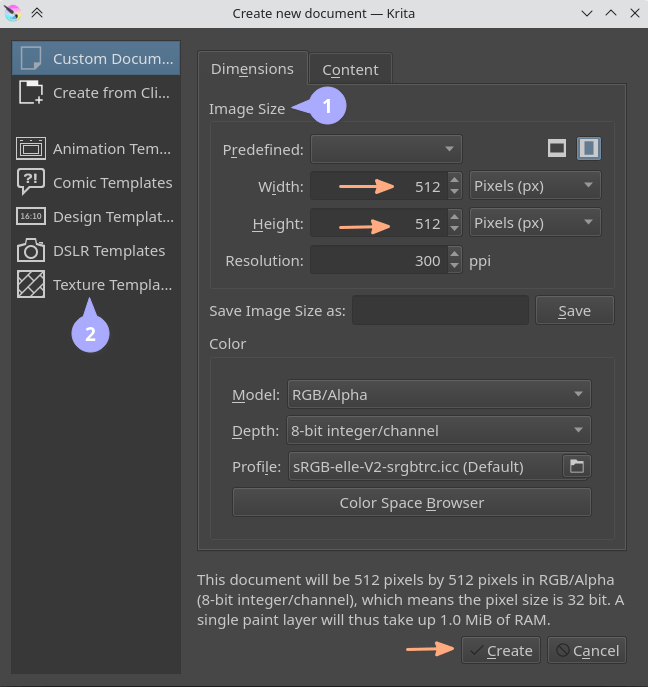
In the Image Size section marked are number 1 in the image above fill in the dimension of the seamless tile we want. Here I fill in 512px by 512px. We can also choose a ready-made texture template from the template section marked as number 2 in the image. After choosing and filling in the detail click on Create button.
Step 2 - Wrap Around Mode
Now thaNow that we have our document ready, the fun part begins here. Go to the View menu and click on “ Wrap Around Mode“. Or simply press the shortcut “Shift + W”.
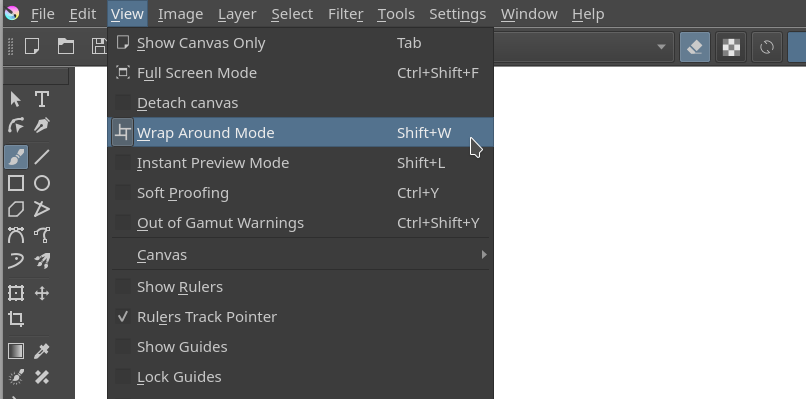
You will notice that the whole canvas has turned white. Fear not half of our work has been done here. Now, all we need to do is draw and paint a pattern and then save it.
Step 3 - Draw a pattern
Just take your favourite brush and start drawing. You’ll notice that Krita will give you a live preview of your pattern while you draw. It will automatically handle the edges for you, by overlapping and repeating things to be seamless. The Krita developers are geniuses.
As you can see in the video above all I am doing is painting the pattern with a simple brush and Krita is just repeating and tiling it automatically. Now I can make patterns for my personalized gift wrap paper with ease and satisfaction 😎
Step 4 - Saving the pattern
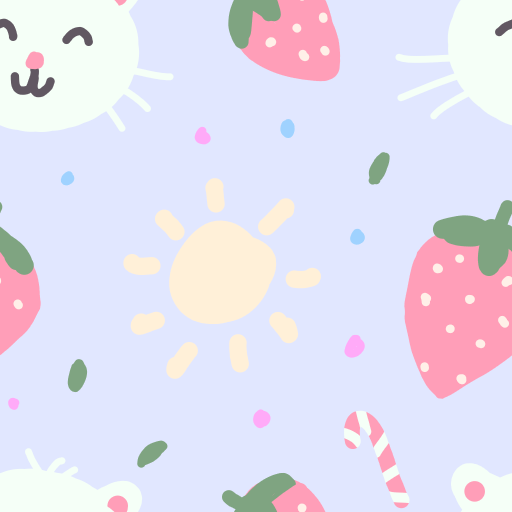
After finishing the pattern, we can switch the Wrap Around Mode and return to normal mode. Just press Shift + W again or click on the options in the View menu. Go to File Menu and click on Save. Save your document as a . KRA file to retain the layers in case you want to edit it later. And then again from the File menu click on Export. Export the tile as a png or jpg whatever suits your requirements are. Here is the pattern that I made in 5 minutes. 🥳
Wasn’t it a piece of cake? I hope you found this small tutorial useful and hopefully this will save you some time while creating patterns of textures. Also checkout my previous post where I have shared some of the patterns and textures that I commonly use in my works here.
Comments
Do you have any feedback or comment on this post?Send a toot to me on fediverse or email me your feedback.